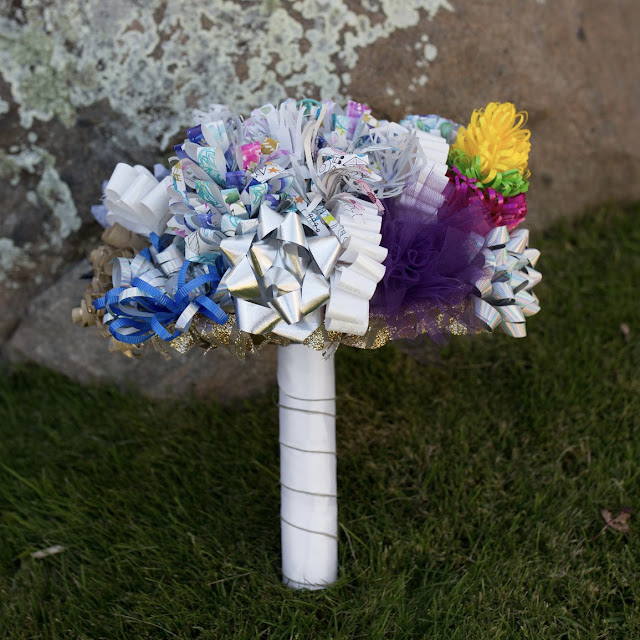
Our Bride: Now in my case, our bride only received a couple ribbons and 2 bows! So I also saved the tissue paper, wrapping paper and a bunch of the decorations to see what I could possibly come up with! It's been a while since I had to do a craft where I was restricted on materials and frankly, I LOVE the challenge!! Check it out!
The Details:
- Time: ~ 15-20 Hours
- Price: None! The challenge is to use only items from the bridal shower!
1. Layout all the Materials:
Here's what I had in front of me
- Gift wrap paper, tissue paper and bows from the gifts opened
- Napkins, plates, cupcake toothpicks
- Giant Ring decor
- Ribbons
- Straws (Used as stems)
2. The Base: So I used the same base here as I did for the first Bow Bouquet I made. I've link that post below, Number 2, to see how it was done. Mainly take a plate, a paper towel roll cardboard and ribbon to create a sturdy bottom! I also laid out pieces of the ribbon off the edges for flair!
3. Start Playing:
4. Types of Flowers: Ive created separate smaller blog posts with instructions on how to do different types of flowers with paper! I pretty much chose one type of wrapping paper or tissue paper to do each type of flower and that worked out super well.
a. Tissue Paper Flowers - LINK
b. Wrapping Paper Dahlias - LINK
c. Stick Paper Flowers - LINK
5. Assemble: So I used some of the gross tissue paper and balled it up to create different heights underneath the flowers. I was able to use the straws by either cutting them to heights that worked or glueing them under the balls of tissue to create a certain angle for the flower to sit. Be sure to create diversity in your flower placement and cover up any and all areas where you can see the balled up tissue underneath.
6. Lefotovers: With any left over materials, make some amazing mini bouquets for the bridesmaids!


.png)

Post a Comment